Why Is Machining Stainless Steel So Difficult for Medical Device Parts?
Why Is Machining Stainless Steel So Difficult for Medical Device Parts?
Machining stainless steel is common in medical device manufacturing because the material can offer corrosion resistance, strength, and a clean finished surface. Demand is not going away either. In its May 29, 2026 release, worldstainless reported 15.8 million tonnes of stainless steel melt shop production in Q1 2026, up 2.5% from Q1 2025. If you are comparing stainless steel with other options for machined medical parts, the Jieerda Materials page is a useful place to start.
Still, stainless steel can punish a weak machining plan. It gets hot at the cutting edge, hardens if the tool rubs, throws stringy chips, and shows every small burr on a polished surface. For medical parts, the job does not end when the part comes off the CNC machine. You also need stable dimensions, clean edges, controlled residue, and records that can stand up to customer or regulatory review.

Why Is Stainless Steel Harder to Machine Than Carbon Steel?
Stainless steel is not just a shinier version of mild steel. The alloy chemistry that gives it corrosion resistance also changes how it reacts to heat, pressure, and tool contact. A small change in feed, tool sharpness, or coolant flow can turn a normal cut into chatter, built-up edge, or a worn insert before the operator expects it.
Work Hardening at the Cut
Austenitic grades such as 304 and 316L can harden right in front of the cutting edge. If the tool dwells, rubs, or takes a feed that is too light, the next pass may meet a tougher surface than the one before. The British Stainless Steel Association notes that stainless steel machining should avoid dwell, rubbing, vibration, and tool chatter, and that deep cuts and higher feed rates help get below the work-hardened layer.
Low Heat Flow at the Edge
Stainless steel does not move heat away from the cut as quickly as many plain steels. More heat stays close to the tool face and the freshly machined surface. That heat can shorten tool life, stain the surface, move dimensions during the cut, and sometimes create a finish that looks acceptable at first glance but fails a later visual check.
Long Chips and Tool Pressure
Many stainless grades form long, tough chips. On a small turned medical pin, those chips can wrap around the tool or part. On a milled slot, they can recut and scratch a surface that was already close to final finish. Chip control is not a small shop-floor detail. It affects safety, finish, cycle time, and scrap.
Which Stainless Steel Grades Fit Medical Device Parts?
The right grade depends on contact type, corrosion risk, strength, cleaning method, sterilization method, and the drawing standard. A grade name alone is not enough. For a medical device project, you should tie the material callout to the part function and then match the machining plan to that grade.
316L for Corrosion-Sensitive Parts
316L is often chosen for parts that need better corrosion resistance than 304, especially where cleaning chemicals, body-fluid exposure, or repeated washing may matter. The low carbon version helps reduce carbide precipitation risk during thermal exposure, although machining heat should still be controlled. For small medical housings, fittings, and fluid-contact components, 316L is often a practical starting point.
17-4 PH for Higher Strength Features
17-4 PH stainless can be a better fit when the part needs higher strength, spring-like behavior, or better wear resistance after heat treatment. It can suit surgical instrument components, shafts, clamps, and structural features. The tradeoff is that heat treat condition changes hardness and size, so you need to plan rough machining, heat treatment, and finish machining in the right order.
304 and 303 for Fixtures or Non-Critical Parts
304 can work well for brackets, guards, lab hardware, and non-implant components where corrosion resistance is useful but 316L is not required. 303 machines more easily because of sulfur additions, but that same feature can reduce corrosion performance and makes it a poor default choice for patient-contact or fluid-contact medical parts. It may still be useful for fixtures, setup aids, or non-critical hardware when the risk file permits it.
How Should You Set Tools, Feeds, and Coolant?
Good stainless machining usually looks deliberate, not gentle. A hesitant cut can be worse than a firm one. Seco Tools describes stainless tool wear as predictable when you account for work hardening and poor heat conduction, and it notes that machining stainless steel can raise tool and insert use by about 10% to 20% compared with simple steels. That cost needs to be in the quote, not discovered after the first production run.
Sharp Carbide and Rigid Setup
Sharp tools reduce rubbing. A rigid setup reduces chatter. That sounds basic, but it is where many stainless problems begin. Use short tool stick-out, solid workholding, and a machine that can hold the programmed feed without slowing under load. A small benchtop machine can make a prototype, sure, but it may not show the same behavior as a production CNC cell.
Real Chip Load Instead of Rubbing
Feed must be high enough to make a chip, not polish the surface. If the tool only skates over the metal, the surface can harden and fight the next pass. For tiny slots, thin walls, or micro holes, this balance gets touchy. You may need a lighter radial engagement but still keep enough chip load per tooth to avoid rubbing.
Coolant Flow That Carries Heat Away
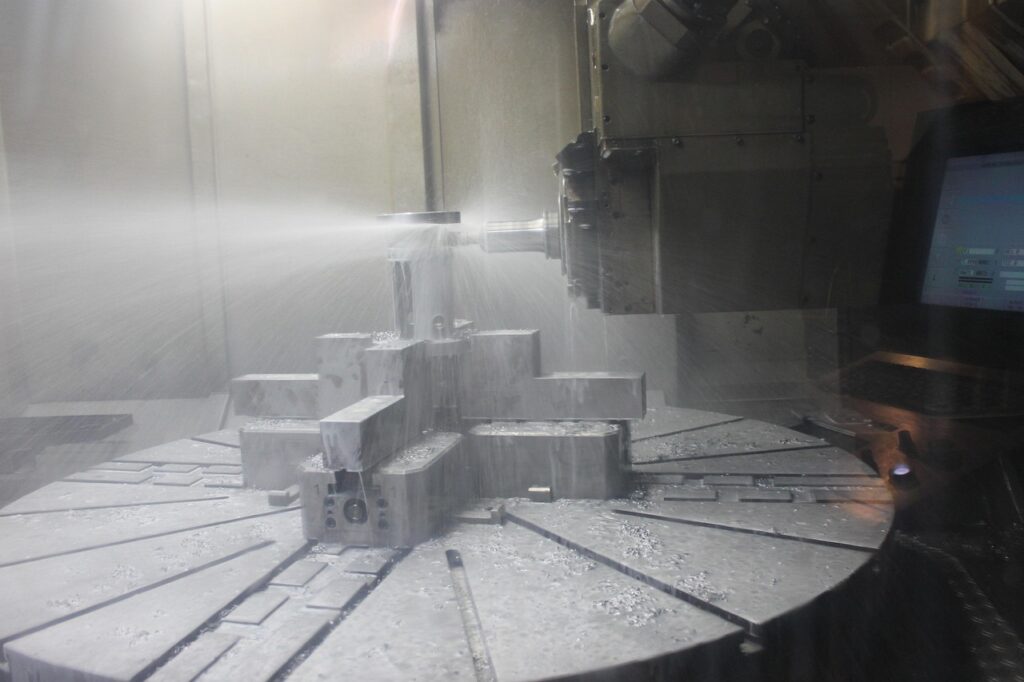
Coolant is not just there to make the cut look wet. It should reach the cutting edge, flush chips, and carry heat away from the part. In drilling, through-tool coolant can help break chips and prevent packing. In milling, directed coolant or air blast can keep chips from being cut twice. A simple checklist helps:
- Keep tool overhang short and use the largest practical tool body.
- Choose inserts or end mills made for stainless steel, not only general steel.
- Avoid dwell at the bottom of holes, pockets, and grooves.
- Check chips and inserts early in the run, not only after dimensions drift.
What Quality Risks Matter Most After Machining?
Medical device stainless parts often fail for small reasons. A burr in a cross hole, a heat-tinted edge, or oil trapped in a blind thread can matter more than a dramatic tolerance miss. ISO describes ISO 13485 as a quality management system standard for organizations involved in design, production, installation, and servicing of medical devices and related services. In that setting, machining choices become part of a controlled manufacturing story.
Burrs Around Tiny Holes
Burrs are normal in metal cutting, but they are not harmless. A burr can block fluid flow, cut an O-ring, trap soil, or shed particles. Cross holes in 316L tubing, small slots in instrument jaws, and threaded ports all need a deburring plan that does not round critical edges too far. Ask for edge-break notes that are measurable, not vague.
Heat Tint and Passive Film Damage
Overheating can leave color on stainless surfaces and may hurt corrosion resistance. If the finished part will be passivated, electropolished, or cleaned in a validated process, the machining operation should not create surface damage that the finishing step cannot remove. A shiny part is not always a clean or corrosion-ready part. That little blue mark near a slot can cause a surprisingly long quality discussion.
Residue From Cutting Fluid
Cutting fluids, tapping oils, polishing compounds, and abrasive media can stay in threads, blind holes, and tight internal corners. For medical device parts, residue control should be planned before production. You should define cleaning steps, inspection methods, and acceptance criteria. If the part has a narrow lumen or deep blind hole, test cleaning on real geometry instead of guessing from a flat coupon.
How Do FDA and ISO Expectations Change the Machining Plan?
Regulatory expectations do not tell you the exact spindle speed for 316L, but they do affect how you control and record the process. The FDA states that the revised 21 CFR Part 820, now called the Quality Management System Regulation, became effective on February 2, 2026, and incorporates ISO 13485:2016 by reference. That makes documented control more important for medical device suppliers working with U.S. customers.
Documented Process Parameters
For repeat production, the approved method should include more than a program file name. It should cover material grade, heat or lot, tool type, coolant, in-process checks, deburring method, cleaning method, and final inspection. If a parameter is critical to surface finish or burr control, record it where the operator can actually use it.
Lot Traceability and Material Certificates
Material traceability protects both sides of the purchase order. You should ask for mill certificates, grade verification when needed, and clear lot separation during machining. Mixing 304, 316L, and 17-4 bar stock in the same cell without strong labeling is asking for trouble. It may not happen often, but one mix-up can eat a whole week.
Change Control Before Production Moves
A tool brand change, coolant change, new deburring media, or outside passivation supplier can change the finished part. Some changes look harmless to purchasing but serious to quality. Before moving production, define which changes need approval, which need first article inspection, and which need added cleaning or corrosion checks.
How Can You Plan a Stainless Steel Machining Project?
A good stainless steel machining project starts before the first bar is loaded. The drawing, grade, finish callout, tolerance stack, and inspection plan should fit together. When those details are clear, the supplier can quote the job more accurately and build a process that survives repeat orders.
Drawings That State Function
A drawing should show the grade, standard, heat treatment condition if any, surface finish, edge condition, cleaning requirement, and passivation or electropolishing need. If a hole carries fluid, say so. If a surface seals against silicone, say so. Functional notes help the machinist protect the features that matter most.
Tolerance Stack-Up Before Cutting
Stainless steel can move during machining, especially thin parts, long slots, and heat-treated features. Review wall thickness, flatness, and concentricity before release. Sometimes a slightly different datum plan or stock allowance saves hours of inspection debate later.
Supplier Questions That Save Rework
Before placing an order, ask practical questions. Which stainless grades does the shop run often? How are burrs removed from cross holes? How is coolant residue cleaned from blind features? Can the supplier separate lots and provide inspection records? The answers will tell you more than a glossy capability list.
FAQ
Q1: Is 316L Always the Best Stainless Steel for Medical Parts?
A: No. 316L is common for corrosion-sensitive parts, but 17-4 PH, 304, or another alloy may fit better depending on strength, contact type, cleaning, and regulatory requirements.
Q2: Why Does Stainless Steel Work Harden During Machining?
A: The tool pressure deforms the surface near the cut. If the tool rubs or dwells, that surface can harden, making the next pass harder and increasing tool wear.
Q3: Can You Use 303 Stainless Steel for Medical Device Components?
A: Sometimes, but usually only for non-critical or non-patient-contact parts. Its sulfur content helps machinability but can reduce corrosion performance, so the risk must be reviewed.
Q4: Does Passivation Fix All Stainless Steel Machining Problems?
A: No. Passivation can improve the stainless surface condition, but it cannot correct deep scratches, heavy burrs, bad geometry, or heat damage that was not removed first.
Q5: What Should You Send for an Accurate Stainless Steel Machining Quote?
A: Send the drawing, grade, standard, finish requirement, annual volume, inspection needs, cleaning requirement, and any use-case details that affect burrs, sealing, corrosion, or traceability.